

Buenas a todos, de vuelta al cole, os dejo esta segunda parte de la figura de Olfo que ha sido la última figura de 54 mm pintada por mí. Si en la primera parte os enseñaba a crear una peana escénica para la figura, esta vez me centraré en el pintado de la peana y de la figura.
Hello guys, I put the second part of the figure of Olfo. Olfo Is my last figure of 54 mm painted. In the first part I taught to create a pedestal scenic to the figure, we will now talk of painted of the figure and the pedestal.

Comienzo pintando la pared y el cuadro con óleos. Una de las cosas a las que me estoy acostumbrando es a pintar con óleos. Llevo un tiempo pintando cuadros y para muchas cosas los difuminados de óleo son mucho más fáciles de conseguir. Posteriormente tras pintarlo junto con la estantería creo el efecto de luz del farolillo y sigo con la pintura de objetos que estarán en la estantería. Adjunto fotos del proceso.
I painted the wall and the picture with oil paintings. I like to paint pictures.I think that the shadings of oil are much easier to achieve. After painting together with the shelf I painted the effect of light of the lantern and I continue with the painting of objects that will be on the shelf. Photos of the process.


Tras pintar la peana dejo para mas adelante cuando ponga la figura retocar el suelo y ponerle pigmentos y oscurecerlo un poco más.
After painting the pedestal pintare the ground and was put pigments.

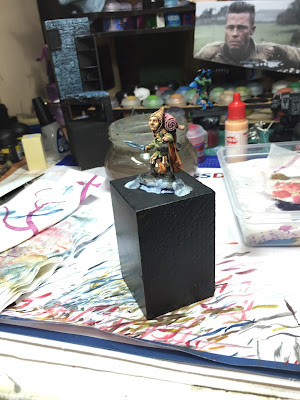
Comencé a pintar la figura en primer lugar con la cara y posteriormente los cueros de la capa para encuadrar la figura y la ropa, siendo en verde claro la camisa y pantalones a ralla, con franjas marrones y blancas.
First pinto the face and then hides the layer and clothing, being in green shirt and trousers to grate, with brown and white stripes.


Posteriormente comienzo con la parte de atrás de la figura como la mochila y demás pertrechos y bagajes. Y después comienzo con la espada en NMM.
Subsequently beginning with the back of the figure as the backpack and other things. After beginning with the sword in NMM.


Una de las últimas cosas en pintar es el farolillo. El efecto de luz en la ropa y cuero lo dí con veladuras de amarillo. Hay que tener en cuenta que el punto de máxima luz está en el farolillo y de ahí trazar un círculo a todo lo que ilumina para poder tenerlo en cuenta.
One of the last things in painting is the lantern. The effect of light in the clothing and leather what gave shades of yellow. It must be borne in mind that the point of maximum light is in the lantern and hence I made a circle to everything that illuminates in order to take this into account.
 Creamos un cartel curioso y listo !!!
We create a curious poster and finished.


Por último oscurecí el suelo para dar un contraste con la figura.
Finally create shadows on the floor to provide a contrast with the figure.


Bueno amigos esto ha sido todo eurekos, espero que os guste.
Cuidaros y hasta pronto !! Bye, bye.
Elinhir.
I painted the wall and the picture with oil paintings. I like to paint pictures.I think that the shadings of oil are much easier to achieve. After painting together with the shelf I painted the effect of light of the lantern and I continue with the painting of objects that will be on the shelf. Photos of the process.


Tras pintar la peana dejo para mas adelante cuando ponga la figura retocar el suelo y ponerle pigmentos y oscurecerlo un poco más.
After painting the pedestal pintare the ground and was put pigments.

Comencé a pintar la figura en primer lugar con la cara y posteriormente los cueros de la capa para encuadrar la figura y la ropa, siendo en verde claro la camisa y pantalones a ralla, con franjas marrones y blancas.
First pinto the face and then hides the layer and clothing, being in green shirt and trousers to grate, with brown and white stripes.

La manta comienzo con una capa base de rojo oscuro mezclado con un poco de beig para ir subiendo en las luces utilizando punteado irregular para crear la textura.
The blanquet paint a base coat of dark red mixed with a little beig to go up on the lights using dotted irregularly to create the texture.


Posteriormente comienzo con la parte de atrás de la figura como la mochila y demás pertrechos y bagajes. Y después comienzo con la espada en NMM.
Subsequently beginning with the back of the figure as the backpack and other things. After beginning with the sword in NMM.


Una de las últimas cosas en pintar es el farolillo. El efecto de luz en la ropa y cuero lo dí con veladuras de amarillo. Hay que tener en cuenta que el punto de máxima luz está en el farolillo y de ahí trazar un círculo a todo lo que ilumina para poder tenerlo en cuenta.
One of the last things in painting is the lantern. The effect of light in the clothing and leather what gave shades of yellow. It must be borne in mind that the point of maximum light is in the lantern and hence I made a circle to everything that illuminates in order to take this into account.

We create a curious poster and finished.


Por último oscurecí el suelo para dar un contraste con la figura.
Finally create shadows on the floor to provide a contrast with the figure.


Bueno amigos esto ha sido todo eurekos, espero que os guste.
Cuidaros y hasta pronto !! Bye, bye.
Elinhir.
Increíble escena maestro!! Una pregunta , como creas las telerañas ? Quedó muy bien !! Gracias por mostrarlo !
ResponderEliminar
ResponderEliminarMuchas gracias Toño, hago lo que voy pudiendo, jeje. Las telarañas es un efecto sencillo, te dejo el tutorial de las telarañas que tenemos por nuestro amigo Beren:
http://eurekaminiature.blogspot.com.es/2014/04/vide-tutorial-1-telaranas.html
Anda leches ! Con pegamento ? Eso tengo que probarlo !! Muchas gracias por el enlace , lo he guardado para consulta . Ha quedado una escena de cine , gracias maestro !!
ResponderEliminarGracias por seguirnos Toño, un abrazo !!
ResponderEliminar